[>>still populating data 4/12/2014- You are welcome to help. see [1]<<
This guide assumes a basically properly built and calibrated printer Main_Page. This guide is not intended as a design guide, but more as an operational troubleshooting guide. If you
have not read through and attempted a complete calibration, see the REPRAP wiki for Calibration instructions. Some common calibration issues as well as common build related issues however are
discussed.
(Please note: This guide is for identified and resolved issues only. The more common the issue, the better. No questions or open issues belong here, go to the forums for interactive help
(look to your left in the links column). Use clear and concise language, only 6 pics or entries per issue.)
The following categories are used to help identify the print issue by either print defects or by cause (if known). The print defects will point to identified causes and branch into
individual examples and solutions:
BTW, here's another site that has some info: http://www.hauntedfrog.com/gallery/main.php?g2_itemId=7832
-
1 CAUSES:
-
1.1 Material Feed
-
1.2 Material Feed,
Excessive
-
1.3 Material Handling or
Source
-
1.4 Material Handling, Material
Contamination 01
-
1.5 Material Handling, Material
Contamination 02
-
1.6 Material Handling, Material
Contamination 03
-
1.7 Extruding
Temperature
-
1.8 Clogged Extruder
-
1.9 Clogged Extruder
-
1.10 Bed Adherence
-
1.11 Bed Adherence
insufficient
-
1.12 Corner Lift
-
1.13 Bed Adherence
Excessive
-
1.14 Print Speed
-
1.15 Calibration
-
1.16 Non-circular Holes
-
1.17 Skipping Steps
-
1.18 Skipping Steps, Controller
Overpowered
-
1.19 Skipping Steps, Marlin
Configured Incorrectly
-
1.20 Skipping Steps, Controller
Underpowered
-
1.21 Skipping Steps,
Mechanical
-
1.22 Part Temperature
-
1.23 Part Temperature, too hot
01
-
1.24 Part Temperature, Too Cold
01
-
2 PRINT DEFECTS:
|
CAUSES:
Material Feed
Excessive

|
|

|
|
|
Material Feed, Excessive
   [[Image:|x220px|]] [[Image:|x220px|]] [[Image:|x220px|]] [[Image:|x220px|]] [[Image:|x220px|]] [[Image:|x220px|]]
|
Problem
|
Common Cause
|
Correction
|
|
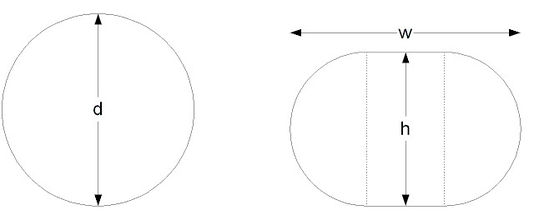
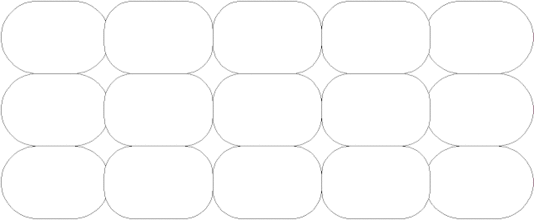
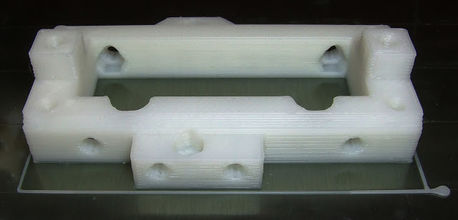
Wall thicknesses are coming out too thick, objects have outside dimensions consistently slightly too large and holes are slightly too small.
|
Slicer software settings for perimeter widths are slightly too high.
|
Reduce flow rate setting for perimeters. Skeinforge has these settings available to change.
|
[2]
|
|
|
|
Nophead has some suggestions in his Hydraraptor blog on 3/13/2011.
|
[3]
|
|
|
|
|
[4]
|
|
|
|
|
|
|
|
|
|
|
|
|
|
|
|
|
|

|
|

|
Insufficient
Intermittent
Material Handling or Source
Material Contamination

|
|

|
|
|
Material Handling, Material Contamination 01
 [[Image:|x220px|]] [[Image:|x220px|]] [[Image:|x220px|]] [[Image:|x220px|]] [[Image:|x220px|]] [[Image:|x220px|]] [[Image:|x220px|]] [[Image:|x220px|]] [[Image:|x220px|]] [[Image:|x220px|]]
|
Problem
|
Common Cause
|
Correction
|
|
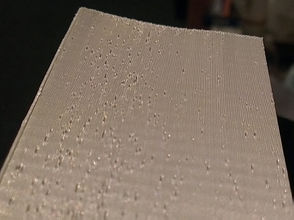
Tiny filament width holes on print sides.
|
Steam blow-outs or bubbles from water absorbed from the humidity in the air into the raw filament during storage prior to printing. ABS is more susceptible to
this as it has an affinity for water.
|
Proper handling of filament to reduce exposure to humidity.
|
[5]
|
|
|
|
Heat raw filament prior to use to remove absorbed water. take care not to melt filament as it will not be usable if it looses its round (cross section) shape
or sticks together and cannot be separated.
|
[6]
|
|
|
|
|
|
|
|
|
|
|
|
|
|
|
|
|
|
|
|
|
|
|

|
|

|

|
|

|
|
|
Material Handling, Material Contamination 02
     [[Image:|x220px|]] [[Image:|x220px|]]
|
Problem
|
Common Cause
|
Correction
|
|
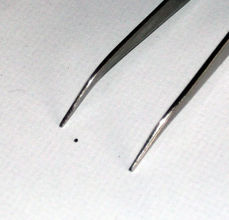
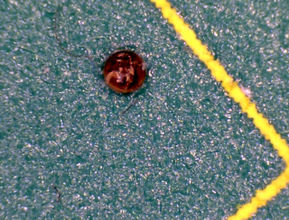
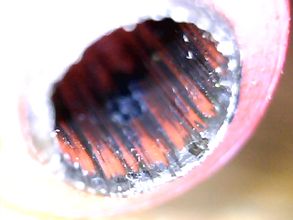
Extruder jams for no apparent reason. After the extruder hot section has been disassembled and cleaned out, it is rare to find the particle that was blocking
the nozzle. Foreign particles may be visible in transparent filaments and may be accompanied by gas bubbles. Test for condition: (may damage nozzle) while
extruder hot, insert a drill bit into the nozzle. If ooze occurs then stops again after drill bit is removed, a foreign particle may be in melt chamber.
|
Particulate inclusions in raw filament as purchased from source. Found in cheap filament (Chinese mfr) noted in PLA from Esun.
|
Use quality filament from known sources.
|
[7]
|
|
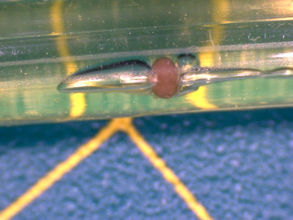
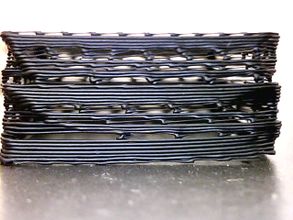
Indications of abrasion may be noticed internally in the thermal isolator of the hot end with the lines of abrasion in the direction of filament feed when
disassembled. Print may show indications of intermittent plugging and unplugging of nozzle. Low melting point metal (likely solder) ball noted in ABS (mfr not
determined).
|
This may indicate sub-orifice size foreign particles passing through extruder.
|
Use quality filament from known sources.
|
[8]
|
|
|
|
|
[9]
|
|
|
|
|
|
|
|
|
|
|
|
|
|
|
|
|
|

|
|

|

|
|

|
|
|
Material Handling, Material Contamination 03
 [[Image:|x220px|]] [[Image:|x220px|]] [[Image:|x220px|]] [[Image:|x220px|]] [[Image:|x220px|]] [[Image:|x220px|]] [[Image:|x220px|]] [[Image:|x220px|]] [[Image:|x220px|]] [[Image:|x220px|]]
|
Problem
|
Common Cause
|
Correction
|
|
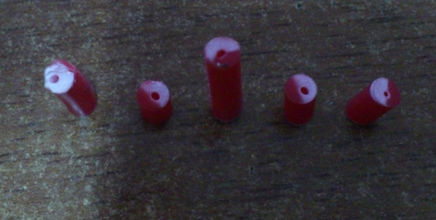
Popping sound from nozzle like air bubbles under pressure or popcorn popping. Causing blowouts and missing plastic in part buildup.
|
Filament (ABS in this case) contains air bubbles or voids from manufacturing process or from absorbed moisture turning to steam.
|
Examine your filament for indications of this manufacturing defect. Use quality filament from known sources
|
[10]
|
|
|
|
|
|
|
|
|
|
|
|
|
|
|
|
|
|
|
|
|
|
|
|
|
|
|
|

|
|

|
Extruding Temperature
Too hot
Too cold
Clogged Extruder

|
|

|
|
|
Clogged Extruder
   [[Image:|x220px|]] [[Image:|x220px|]] 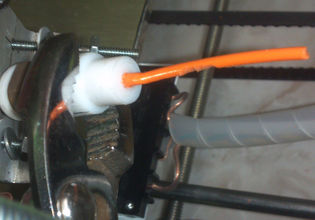 [[Image:|x220px|]] [[Image:|x220px|]]
|
Problem
|
Common Cause
|
Correction
|
|
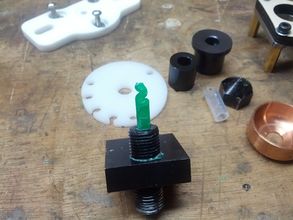
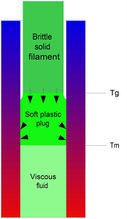
Extruder jams at normal temperatures in the hotend's thermal isolator bore.
|
Excessive thermal isolator bore diameter allowing too much molten plastic back flow too far up isolator bore causing jam when it solidifies.
|
Replace thermal isolator or isolator sleeve leaving .1 to .2mm only above filament diameter clearance for filament thermal expansion. (ex. 3.175mm for 3mm
filament, filament is actually 2.9 +/-.1mm)
|
[11]
|
|
|
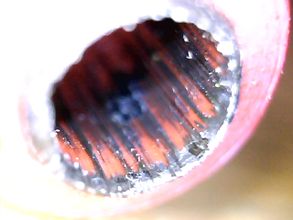
Scratched bore of thermal isolator likely due to contamination, the extra surface area and texture of grooves allows molten plastic to adhere to thermal
isolator bore causing repeated jams.
|
Replace thermal isolator or isolator sleeve.
|
#Material Handling, Material Contamination 02
|
|
|
Thermal isolator damaged bore, swelled bore due to excessive heat and pressure where bore is no longer the same diameter for full length causing jam,
|
Replace thermal isolator or sleeve.
|
#Material Handling, Material Contamination 02
|
|
Extruder frequently becomes jammed, but works fine briefly after clearing the jam
|
Thermal isolator or cold end getting too hot
|
Put a small fan on the hot end to cool the top.
|
|
|
Leaving printer extruder heated up for 20 minutes or more without extruding, the extruder jams.
|
Insufficient length of thermal isolator or insufficient cooling of thermal isolator or cold end of extruder. Heat travels up the filament and may cause
filament distortion above thermal isolator if cooling is insufficient.
|
Lengthen thermal isolator or add a fan to thermal isolator or cold end of extruder and filament. Or limit extruder hot time and/or extrude 10mm every 10
minutes.
|
[12]
|
|
|
|
|
|
|
|

|
|

|
Bed Adherence
Insufficient

|
|

|
|
|
Bed Adherence insufficient
  [[Image:|x220px|]] [[Image:|x220px|]] [[Image:|x220px|]] [[Image:|x220px|]] [[Image:|x220px|]] [[Image:|x220px|]] [[Image:|x220px|]] [[Image:|x220px|]]
|
Problem
|
Common Cause
|
Correction
|
|
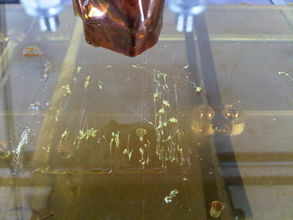
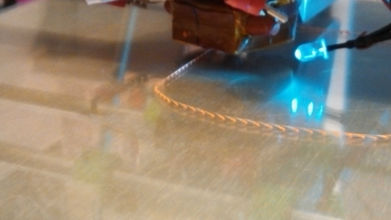
Prints do not adhere to build platform.
|
Print head too high to push plastic against build platform
|
Change height settings to no greater than nozzle diameter above bed, calibrate bottom stop, level build platform
|
|
|
|
Build platform not clean
|
Clean using rubbing alcohol, acetone or amonia, or reapply surface tape
|
|
|
|
Build platform temp too low (other than masking tape bed)
|
Raise build platform temp (max ~65C). PLA sticks to smooth glass above ~53C and above ~65C may add too much heat to the build and lead to slumping.
|
|
|
|
Hot end nozzle temp too low for good adhesion.
|
Raise hot end nozzle temp (see Trifid_Hunter's guide).
|
[13]
|
|
Tall parts tend to detach before build is complete.
|
Too low of contact area for the height or too low adhesion.
|
Select to use a raft with a larger footprint to aid adhesion, or use skirt with zero offset to increase base area.
|
[14]
|
|
|
|
|
|
|
|

|
|

|

|
|

|
|
|
Corner Lift
  [[Image:|x220px|]] [[Image:|x220px|]] [[Image:|x220px|]] [[Image:|x220px|]] [[Image:|x220px|]] [[Image:|x220px|]] [[Image:|x220px|]] [[Image:|x220px|]]
|
Problem
|
Common Cause
|
Correction
|
|
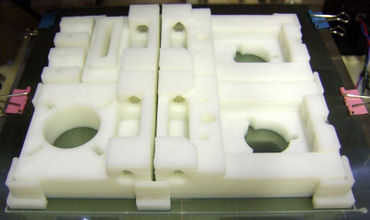
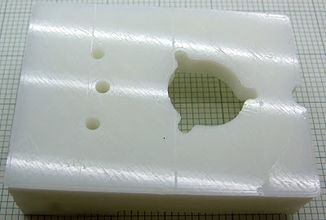
Outside corners lift from build surface as build progresses.
|
Differential cooling of printed object.
|
Select to print a perimeter skirt in Skeinforge or brim in slic3r with a substantial height. The tall skirt/brim acts like a shell which holds in the heat and
reduces corner lift.
|
[15]
|
|
|
objects too close to edge of heated build platforms which are exposed to cooler temperatures.
|
Select to use a skirt/brim of substantial height.
|
[16]
|
|
|
|
You can add custom corner parts just offset from your corners (like a partial skirt) by editing your part or add custom parts to your multi part print plate
that shield the corners from cooling off too fast.
|
[17]
|
|
|
|
|
[18]
|
|
|
|
|
|
|
|
|
|
|
|
|

|
|

|
Excessive

|
|

|
|
|
Bed Adherence Excessive
  [[Image:|x220px|]] [[Image:|x220px|]] [[Image:|x220px|]] [[Image:|x220px|]] [[Image:|x220px|]] [[Image:|x220px|]] [[Image:|x220px|]] [[Image:|x220px|]]
|
Problem
|
Common Cause
|
Correction
|
|
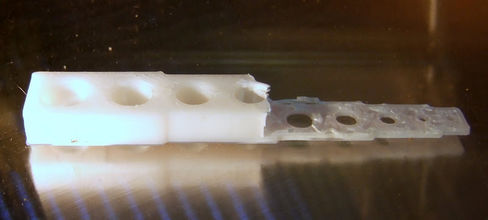
Printed parts adhere to the print bed too aggressively. Shown ABS printed on heated PC (polycarbonate) sheet.
|
Bed material selection needs to be compatible with material printed and temperature used.
|
PLA on heated glass works well as a build surface, Blue painters tape unheated works well for PLA, ABS on heated bed with Kapton tape works well, ABS on heated
bed with PET tape works well. See build forum for examples and suggestions.
|
[19]
|
|
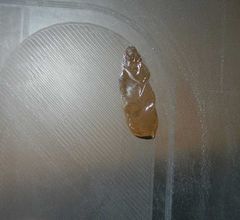
Printed parts adhere too aggressively. Shown ABS on heated glass took chip out of glass.
|
ABS may adhere too aggressively on uncoated glass.
|
Use Glue Stick, Kapton, or PET tape on glass for ABS. See build forum for examples and suggestions.
|
[20]
|
|
|
|
|
|
|
|
|
|
|
|
|
|
|
|
|
|
|
|
|
|
|

|
|

|
Print Speed
Too Fast
Too Slow
Calibration
Circularity

|
|

|
|
|
Non-circular Holes
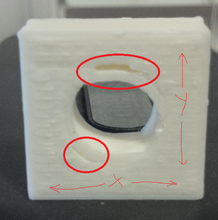 [[Image:|x220px|]] [[Image:|x220px|]] [[Image:|x220px|]] [[Image:|x220px|]] [[Image:|x220px|]] [[Image:|x220px|]] [[Image:|x220px|]] [[Image:|x220px|]] [[Image:|x220px|]] [[Image:|x220px|]]
|
Problem
|
Common Cause
|
Correction
|
|
Holes come out compressed in one direction (X or Y).
|
Loose drive train on the deformed axis.
|
Inspect the discrepant axis drive train for excessive slack in belt, loose gears on shafts or gear play then tighten as appropriate.
|
[21]
|
|
|
|
|
|
|
|
|
|
|
|
|
|
|
|
|
|
|
|
|
|
|
|
|
|
|
|

|
|

|
scale
Skipping Steps
Controller Overpowered

|
|

|
|
|
Skipping Steps, Controller Overpowered
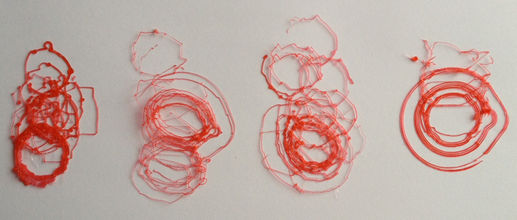 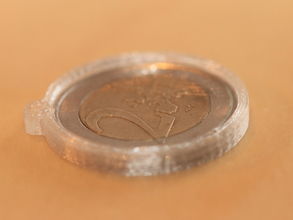 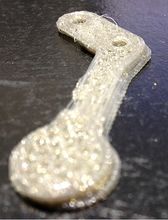 File:?File:?File:? File:?File:?File:?
|
Problem
|
Common Cause
|
Correction
|
|
printer head fails to keep its position and prints successive layers offset from lower layers. Frequently called skipping steps, joggle or offsetting.
|
The problem with the red coin holder was caused by stepper controllers had their potentiometers (pots) adjusted too high (clockwise), causing overheating of
stepper controller and causing a short controller reset to cool down (fraction of a second each time). This high setting may also produce hotter stepper
motors.
|
Reduce pot setting (current) by carefully turning pot counter-clockwise.
|
[22]
|
|
|
Excessively high software setting for acceleration or speed too fast for minimum move length possibly producing a mechanical resonance in the machine which
produces enough inertia to overcome the stepper torque.
|
Reduce the acceleration setting in software or reduce speed.
|
|
|
|
Custom hardware or electronics which have not been integrated already by someone else.
|
See REPRAP development wiki and any other information sources and keep reading.
|
[23]
|
|
|
|
|
|
|
|
|
|
|
|
|
|
|
|
|
|

|
|

|
Marlin Configuration.h

|
|

|
|
|
Skipping Steps, Marlin Configured Incorrectly
 File:?File:?File:?File:?File:? File:?File:?File:?File:?File:?
|
Problem
|
Common Cause
|
Correction
|
|
First few layers of an object print malformed and squished
|
Printer prints all layers, but there is little to no movement in the Z-axis with stepper noise similar to binding / angry bees on the first several layers.
Exploration of the Gcode reveals large acceleration numbers, +1000, for all axis movements.
|
Changing the acceleration in the Marlin Configuration.h file on lines 390, 391, 393 and 394 should correct the issue if it is truly an acceleration issue.
Working values are in the Alt-Text of the image.
|
?
|
|
|
|
|
|
|
|
|
|
|
|
|
|
|
|
|
|
|
|
|
|
|
|
|
|
|
|

|
|

|
Controller Underpowered

|
|

|
|
|
Skipping Steps, Controller Underpowered
File:?File:?File:?File:?File:?File:?
|
Problem
|
Common Cause
|
Correction
|
|
printer head fails to keep its position and prints successive layers offset from lower layers.
|
Stepper controllers with their potentiometers (pots) adjusted too low (counter-clockwise), causing stepper to miss steps. This low setting may be indicated by
cold or just about warm stepper motors or pot setting less than about mid-travel. There is a procedure for electrically measuring and calculating an optimum
setting, but many choose the simpler tweaking method (until it works).
|
Increase pot setting (current) by carefully turning pot clockwise.
|
?
|
|
|
|
|
|
|
|
|
|
|
|
|
|
|
|
|
|
|
|
|
|
|
|
|
|
|
|

|
|

|
Mechanical

|
|

|
|
|
Skipping Steps, Mechanical
File:?File:?File:?File:?File:?File:?
|
Problem
|
Common Cause
|
Correction
|
|
printer head fails to keep its position and prints successive layers offset from lower layers; effects similar to over or underpowered motors (see above)
|
Excessive friction in the x, y or z stages or slides. This may create a load too high for the rated torque of the stepper.
|
Prior to adding stepper motors to the assembly preferably, or without motors energised move stages by hand to feel for excessive friction and/or look for
indications of rubbing or binding. without steppers, the stages should slide with less than 100 grams of force.
|
?
|
|
|
Mechanical slipping in the drive train of the cartesian stages (X, Y or Z) like the toothed belt jumping teeth on its sprocket or the sprocket slipping on
stepper shaft.
|
Determine if mechanical slipping is occurring by marking each belt, sprocket and stepper shaft and run the printer until it skips and check for misalignment of
marks to indicate the source of the mechanical slippage. Correct slippage by tensioning belt or tightening offending sprocket.
|
|
|
|
Excentric belt pulley.
When the bore of the pulley is not centric, the pulley will periodically increase/decrease the belt tension.
|
Reducing belt tension, increasing motor power or reducing printing speed/acc may reduce the problem, but the only real fix is to use a pulley that is centric:
too low a belt tension will cause slip (see above), increasing motor power may cause skips itself (see above)
|
|
|
|
|
|
|
|
|
|
|
|
|
|
|
|
|
|
|

|
|

|
Part Temperature
Too hot

|
|

|
|
|
Part Temperature, too hot 01
   [[Image:|x220px|]] [[Image:|x220px|]] [[Image:|x220px|]] [[Image:|x220px|]] [[Image:|x220px|]] [[Image:|x220px|]]
|
Problem
|
Common Cause
|
Correction
|
|
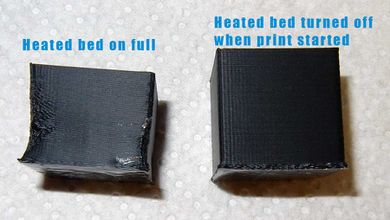
Prints warp at height
|
Part temperature builds up as part is built
|
Change settings to turn off or down temp of heated build platform after base layers are complete. Ex: with heat on all through print and off upon print start
(starting at full temp but cooling as it goes) (pic01).
|
?
|
|
|
|
Reduce print speed to allow time to cool down
|
[24]
|
|
|
|
Introduce wait states/orbit for each layer
|
[25]
|
|
|
|
Add fan to reduce heat of part.
|
|
|
|
|
|
|
|
|
|
|
|
|
|

|
|

|
Too cold

|
|

|
|
|
Part Temperature, Too Cold 01
  [[Image:|x220px|]] [[Image:|x220px|]] [[Image:|x220px|]] [[Image:|x220px|]] [[Image:|x220px|]] [[Image:|x220px|]] [[Image:|x220px|]] [[Image:|x220px|]]
|
Problem
|
Common Cause
|
Correction
|
|
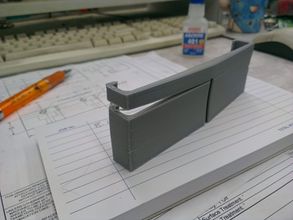
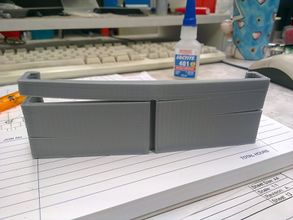
Part warping and delamination as print progresses.
|
Part cools too fast causing contration especially in ABS which has a higher glass transition temp of ~140C.
|
Print perimeter surrounding skirt full height of part to keep the heat in.
|
[26]
|
|
|
|
Enclose printer or print envelope in a box or bag to retain heat during print. Take care not to overheat printer parts which are not tolerant of heat.
|
|
|
|
|
Heat treat part post print (if it survives until then) using heated build platform and a cardboard box.
|
|
|
|
|
|
|
|
|
|
|
|
|
|
|
|
|
|
|

|
|

|
PRINT DEFECTS:
Surface Defects
Pitting/Holes
#Material
Contamination
Small Single Filament
Large Area of Filament
Jagged/Waviness

|
|

|
|
|
Jagged Edges
  [[Image:|x220px|]] [[Image:|x220px|]] [[Image:|x220px|]] [[Image:|x220px|]] [[Image:|x220px|]] [[Image:|x220px|]] [[Image:|x220px|]] [[Image:|x220px|]]
|
Problem
|
Common Cause
|
Correction
|
|
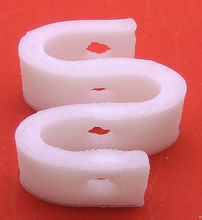
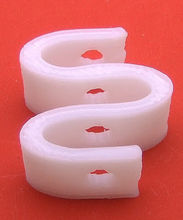
Jagged edges in some locations adjacent to short edgefill segments.
|
Harmonic frequencies may be overloading the rigidity of the mechanical system.
|
Reduce frequency of moves by some means. Increasing the minimum length setting is a global way to reduce move induced vibration. Also reducing move speed or
acceleration may reduce these issues.
|
[27]
|
|
|
|
|
|
|
|
|
|
|
|
|
|
|
|
|
|
|
|
|
|
|
|
|
|
|
|

|
|

|
Solidity of Surface

|
|

|
|
|
Top Layers Not Solid
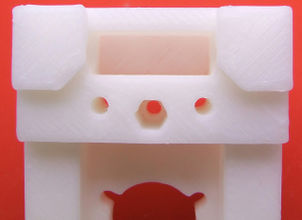 [[Image:|x220px|]] [[Image:|x220px|]] [[Image:|x220px|]] [[Image:|x220px|]] [[Image:|x220px|]] [[Image:|x220px|]] [[Image:|x220px|]] [[Image:|x220px|]] [[Image:|x220px|]] [[Image:|x220px|]]
|
Problem
|
Common Cause
|
Correction
|
|
Not all areas which are external surfaces have the same fully solid surfaces. Also related is the alternate condition of lumpy walls and ridges on the top
surface. See bottom of rectangular well in pic.
|
Skeinforge setting "Infill Interior Density over Exterior Density" ratio, which defaults to 0.9 may cause the lack of solidity and compensating with other
settings may produce the latter effects.
|
In Skeinforge set Infill Interior Density over Exterior Density to 1.0. (This setting has been removed in later versions of Skeinforge.[28])
|
[29]
|
|
|
|
|
|
|
|
|
|
|
|
|
|
|
|
|
|
|
|
|
|
|
|
|
|
|
|

|
|

|
Strings
Blobs
Fineness of Detail
Filaments not Touching
Infill Gaps

|
|

|
|
|
Infill gaps to perimeter
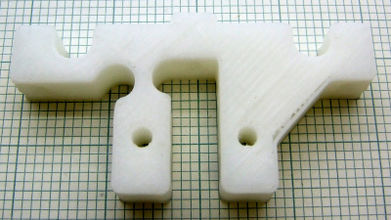 [[Image:|x220px|]] [[Image:|x220px|]] [[Image:|x220px|]] [[Image:|x220px|]] [[Image:|x220px|]] [[Image:|x220px|]] [[Image:|x220px|]] [[Image:|x220px|]] [[Image:|x220px|]] [[Image:|x220px|]]
|
Problem
|
Common Cause
|
Correction
|
|
Infill gaps to perimeter occur on one side of the part.
|
Excessive force required to pull filament from its bin or reel.
|
Rework filament retrieval system to reduce friction or pull load to printer.
|
[30]
|
|
|
If other deformations are occurring in the layer, the infill is usually not the primary concern.
|
Solve the deformed contours issues first.
|
#Circularity
|
|
|
An axis that has the drive belt not in the centre of mass and play in the bearings may also be a cause. Check that all axiis on the printer don't have any
movement directionally.
|
Fix any major looseness and play on linear bearings.
|
|
|
|
|
|
|
|
|
|
|
|
|
|
|
|
|
|
|

|
|

|

|
|

|
|
|
Infill gaps to perimeter 02
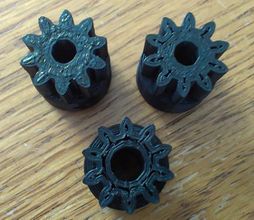 [[Image:|x220px|]] [[Image:|x220px|]] [[Image:|x220px|]] [[Image:|x220px|]] [[Image:|x220px|]] [[Image:|x220px|]] [[Image:|x220px|]] [[Image:|x220px|]] [[Image:|x220px|]] [[Image:|x220px|]]
|
Problem
|
Common Cause
|
Correction
|
|
Gaps occur between infill and perimeters especially on small details.
|
Some slicing software is more prone to produce infill gaps to perimeters.
|
If you have tried adjusting the settings available in your slicer without success and are tempted to change what should be constant parameters (like nozzle
diameter etc...), you may want to try another slicing program to see if the problem is slicer dependant. There are many slicing programs available.
|
http://forums.reprap.org/read.php?262,237444
|
|
|
|
See the REPRAP wiki list of slicer programs.
|
http://www.reprap.org/wiki/RepRap_Options#Slicing_Software
|
|
|
|
If feature width is not an integer multiple extruded filament width, the slicer program will do its best to fill solid areas but may miss some corners or
edges. Fill settings for Overlap or % infill can be increased to solve some cases.
|
|
|
|
|
|
|
|
|
|
|
|
|
|
|
|
|
|
|

|
|

|
Body Defects
Hole Size

|
|

|
|
|
Holes Undersized
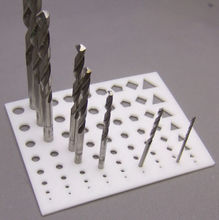 [[Image:|x220px|]] [[Image:|x220px|]] [[Image:|x220px|]] [[Image:|x220px|]] [[Image:|x220px|]] [[Image:|x220px|]] [[Image:|x220px|]] [[Image:|x220px|]] [[Image:|x220px|]] [[Image:|x220px|]]
|
Problem
|
Common Cause
|
Correction
|
|
Holes defined in solid model print smaller in diameter than modeled.
|
Several factors are likely adding up to the result and include faceting error, segment pausing, arc shrinkage and corner cutting.
|
It has been demonstrated that the maximum number of vertices you can have before the hole shrinks is twice the hole size in mm. In other words, a larger #
polygon circle defining a hole does not necessarily make for a more precise hole when printed. For 1mm and under it is suggested to use 3 sides (triangle).
|
[31]
|
|
|
|
|
|
|
|
|
|
|
|
|
|
|
|
|
|
|
|
|
|
|
|
|
|
|
|

|
|

|
Bridging Failure

|
|

|
|
|
Degenerating Bridging
 [[Image:|x220px|]] [[Image:|x220px|]] [[Image:|x220px|]] [[Image:|x220px|]] [[Image:|x220px|]] [[Image:|x220px|]] [[Image:|x220px|]] [[Image:|x220px|]] [[Image:|x220px|]] [[Image:|x220px|]]
|
Problem
|
Common Cause
|
Correction
|
|
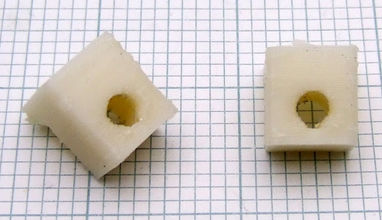
The ability to bridge well is deteriorating over time.
|
Nozzle walls can build up deposits which cause additional restriction within the nozzle after months of use. To verify this is the cause, measure the extruded
filament diameter and verify that it is smaller than originally measured during calibration. Due to die swell, extruded filament diameter is usually not
identical to nozzle hole diameter.
|
With the nozzle heated up carefully ream out nozzle orifice with original size drill bit.
|
[32]
|
|
|
|
|
|
|
|
|
|
|
|
|
|
|
|
|
|
|
|
|
|
|
|
|
|
|
|

|
|

|
Warping
#Part Temperature
Stepping/Offsetting
#Skipping Steps, Controller Overpowered
Interlayer Delamination
#Part Temperature
Failure at Height
#Part Temperature
Overall Disaster

|
|

|
|
|
Computer Freeze
 [[Image:|x220px|]] [[Image:|x220px|]] [[Image:|x220px|]] [[Image:|x220px|]] [[Image:|x220px|]] [[Image:|x220px|]] [[Image:|x220px|]] [[Image:|x220px|]] [[Image:|x220px|]] [[Image:|x220px|]]
|
Problem
|
Common Cause
|
Correction
|
|
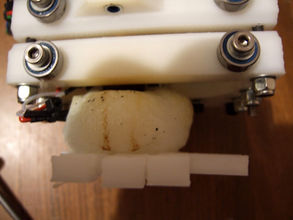
While printing from a computer any type of computer freeze up or communication failure may cause 3D printer damage or worse- a fire. Although I have only heard
of one 3D printer catching on fire, with the electricity and heat there is a hazardous potential.
|
Computer system automatic updates.
|
Set automatic updates to off. The above picture had automatic updates turned off, but Microsoft overrode that and installed them anyway.
|
[33]
|
|
|
Computer lock-up or freeze-up.
|
Print from printer's SD card. The 3D printer printing from it's own SD card removes the computer from the critical information path during the print. It can
seem to be less convenient until you have to rebuild your printer after a failure. Especially helpful on larger print jobs.
|
|
|
|
|
|
|
|
|
|
|
|
|
|
|
|
|
|
|
|
|
|
|
|

|
|

|

|
|

|
|
|
Machine Heat Effects
 [[Image:|x220px|]] [[Image:|x220px|]] [[Image:|x220px|]] [[Image:|x220px|]] [[Image:|x220px|]] [[Image:|x220px|]] [[Image:|x220px|]] [[Image:|x220px|]] [[Image:|x220px|]] [[Image:|x220px|]]
|
Problem
|
Common Cause
|
Correction
|
|
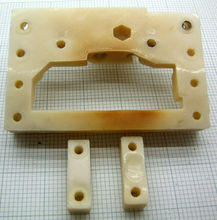
Overheating the machine itself can cause damage to RP (plastic) parts.
|
Heat radiation and convection caused x-stage damage over months of heavy use.
|
Heat shield and or fan cooling of stage.
|
[34]
|
|
|
|
Another reason to have a full set of plastic parts spares on hand. Print them before you have the next problem.
|
|
|
|
|
|
|
|
|
|
|
|
|
|
|
|
|
|
|
|
|
|
|
|

|
|

|

|
|

|
|
|
[[Image:|x220px|]] [[Image:|x220px|]] [[Image:|x220px|]] [[Image:|x220px|]] [[Image:|x220px|]] [[Image:|x220px|]]
|
Problem
|
Common Cause
|
Correction
|
|
If you are not certain about having correctly calibrated your printer,
|
|
verify that it is calibrated first as that is the first step. See Calibration. Verify you also calibrated your extruder. Then verify your extruder zero
height (endstop position) above your print bed is appropriately set.
|
|
|
|
|
|
|
|
|
|
|
|
|
|
|
|
|
|
|
|
|
|
|
|
|
|
|
|
|

|


 [[Image:|x220px|]] [[Image:|x220px|]] [[Image:|x220px|]]
 [[Image:|x220px|]] [[Image:|x220px|]] [[Image:|x220px|]] [[Image:|x220px|]] [[Image:|x220px|]]


 [[Image:|x220px|]]
 [[Image:|x220px|]] [[Image:|x220px|]] [[Image:|x220px|]] [[Image:|x220px|]] [[Image:|x220px|]]


 [[Image:|x220px|]]
  [[Image:|x220px|]]

 [[Image:|x220px|]] [[Image:|x220px|]] [[Image:|x220px|]] [[Image:|x220px|]]

 [[Image:|x220px|]] [[Image:|x220px|]] [[Image:|x220px|]] [[Image:|x220px|]]

 [[Image:|x220px|]] [[Image:|x220px|]] [[Image:|x220px|]] [[Image:|x220px|]]
 [[Image:|x220px|]] [[Image:|x220px|]] [[Image:|x220px|]] [[Image:|x220px|]] [[Image:|x220px|]]


 File:?File:?File:?
 File:?File:?File:?File:?File:?


 [[Image:|x220px|]] [[Image:|x220px|]] [[Image:|x220px|]]

 [[Image:|x220px|]] [[Image:|x220px|]] [[Image:|x220px|]] [[Image:|x220px|]]

 [[Image:|x220px|]] [[Image:|x220px|]] [[Image:|x220px|]] [[Image:|x220px|]]
 [[Image:|x220px|]] [[Image:|x220px|]] [[Image:|x220px|]] [[Image:|x220px|]] [[Image:|x220px|]]
 [[Image:|x220px|]] [[Image:|x220px|]] [[Image:|x220px|]] [[Image:|x220px|]] [[Image:|x220px|]]
 [[Image:|x220px|]] [[Image:|x220px|]] [[Image:|x220px|]] [[Image:|x220px|]] [[Image:|x220px|]]
 [[Image:|x220px|]] [[Image:|x220px|]] [[Image:|x220px|]] [[Image:|x220px|]] [[Image:|x220px|]]
 [[Image:|x220px|]] [[Image:|x220px|]] [[Image:|x220px|]] [[Image:|x220px|]] [[Image:|x220px|]]
 [[Image:|x220px|]] [[Image:|x220px|]] [[Image:|x220px|]] [[Image:|x220px|]] [[Image:|x220px|]]
 [[Image:|x220px|]] [[Image:|x220px|]] [[Image:|x220px|]] [[Image:|x220px|]] [[Image:|x220px|]]